
Use this guide to download your completed sales as an Excel file. You need at least one sale first — see How to record a sale on Posa. Export is available on a paid plan, for the business owner or admin.
1. Open Transactions
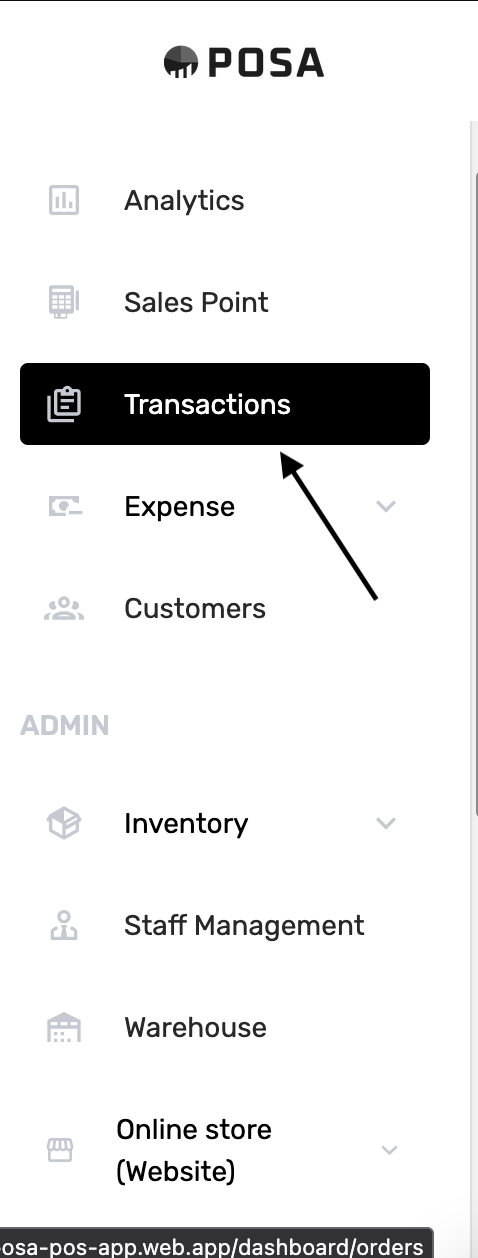
On the left sidebar, under MENU, click Transactions. The menu item turns black when it is selected.
2. The Transactions page
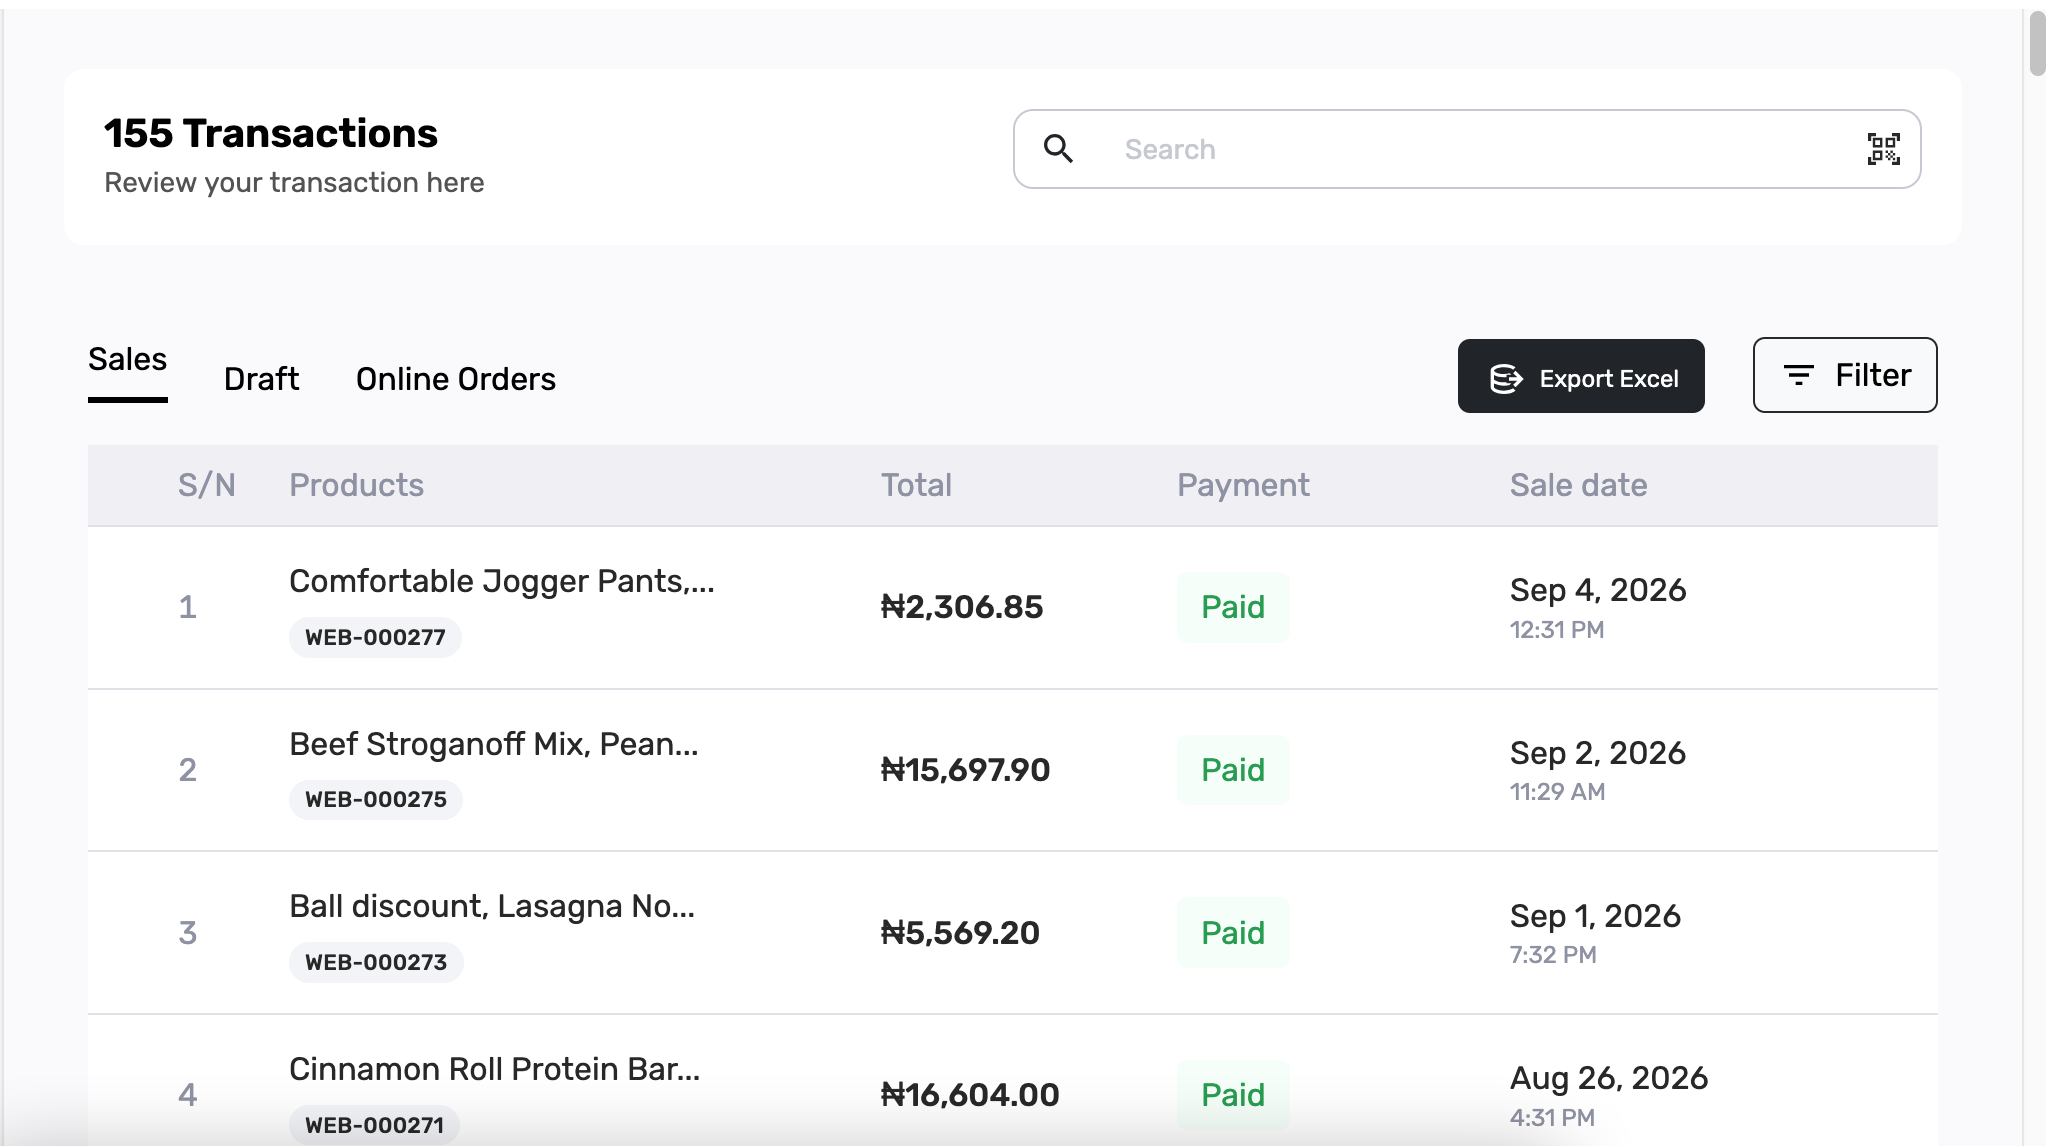
You should see a page titled Transactions, with Review your transaction here under it. Stay on the Sales tab. Your sales appear in a list, with Export Excel on the right. If you see that, you are in the right place.
3. Click Export Excel
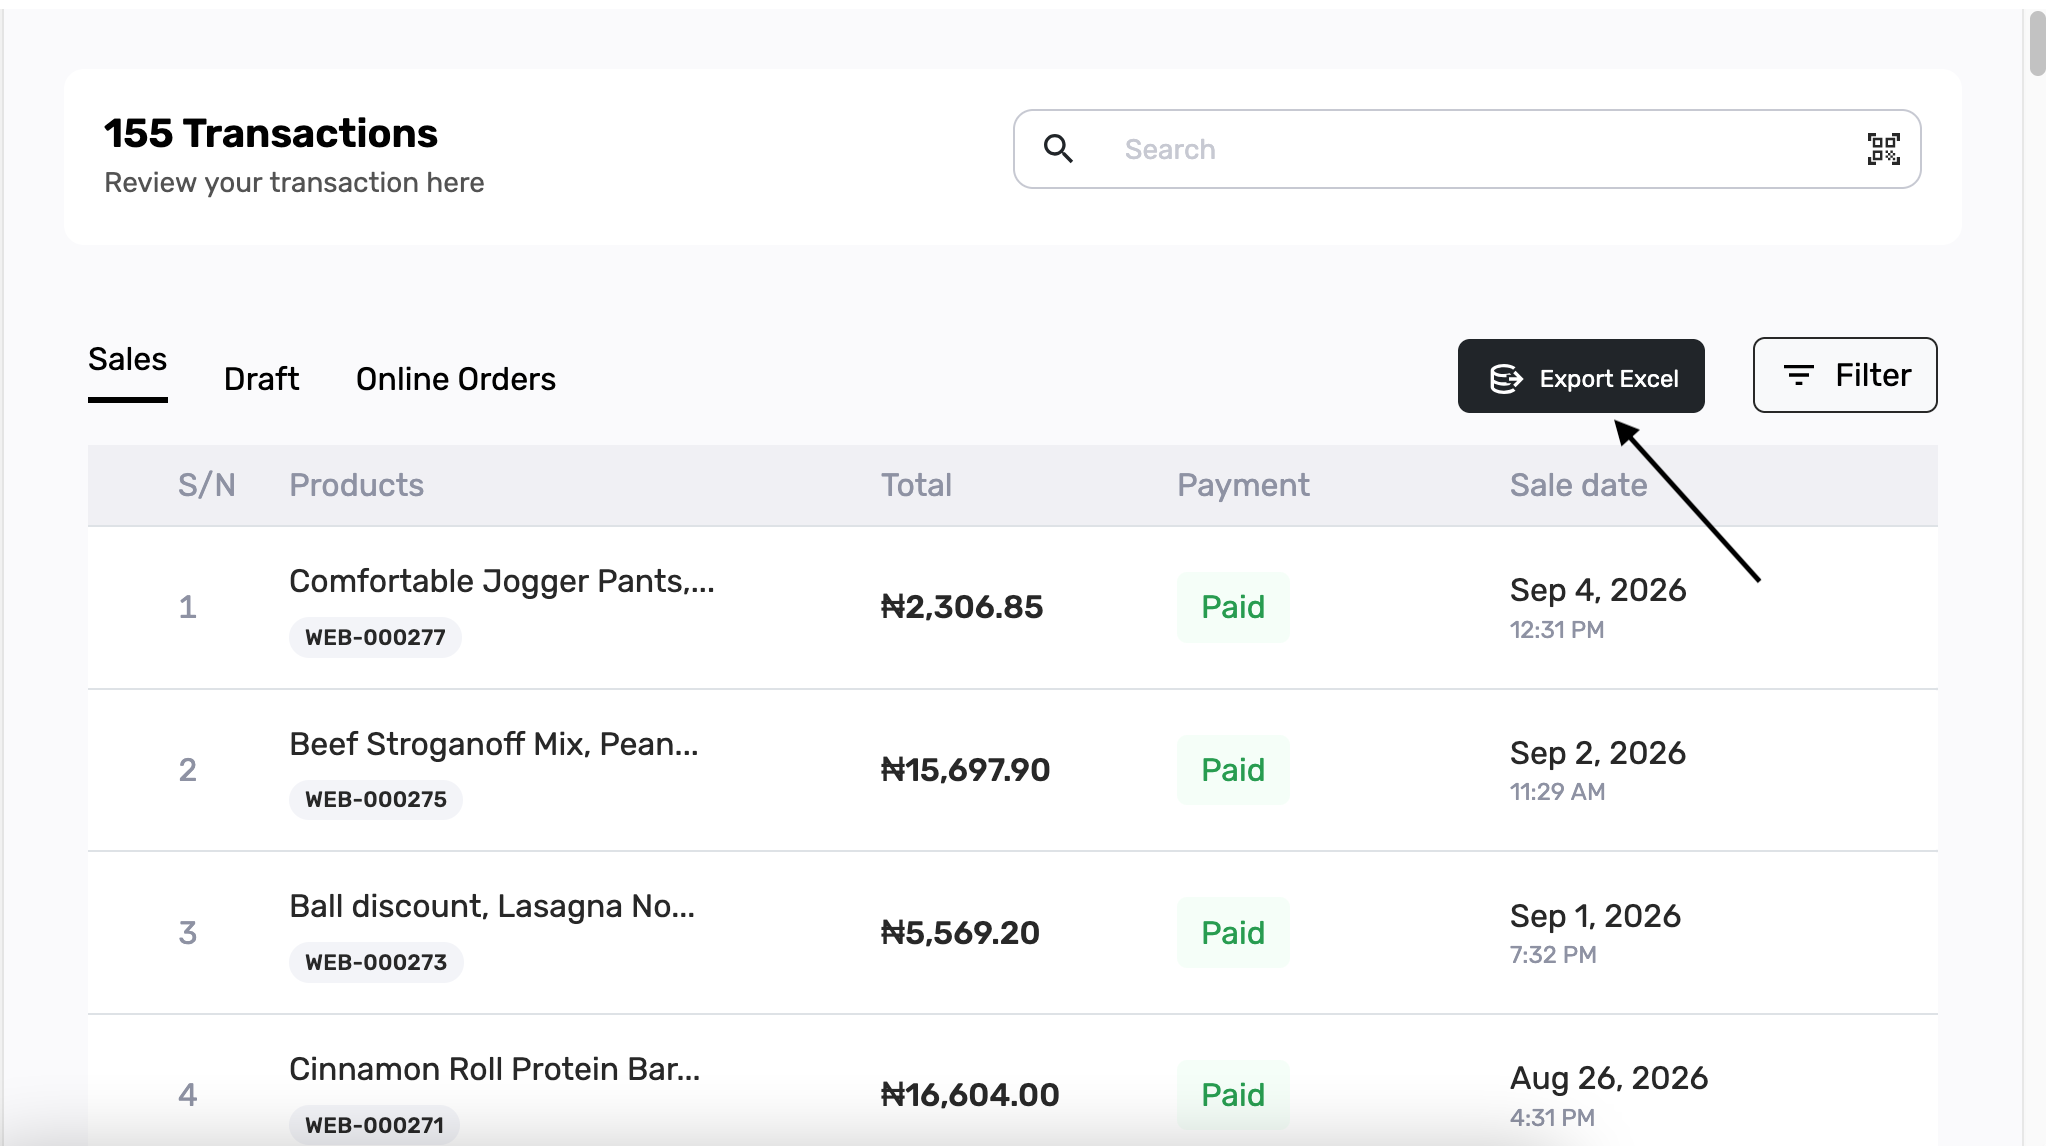
On the right, click Export Excel. Do not use Filter for this guide — Filter only changes what you see on the page. Export Excel is what downloads the file.
4. The Export panel
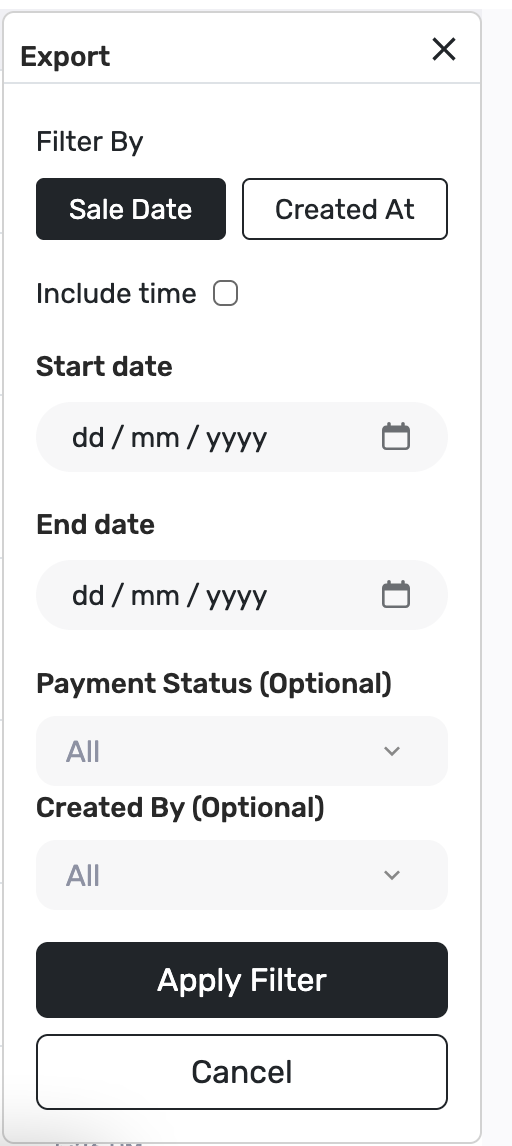
A panel titled Export opens. If you see Filter By, Start date, End date, and Apply Filter, you are on the right track.
Filter By has two options:
- Sale Date — when the sale happened. Use this for most reports. This guide uses Sale Date.
- Created At — when the sale was saved in Posa. Use this if you recorded a sale on a different day from when it happened.
5. Choose start and end dates
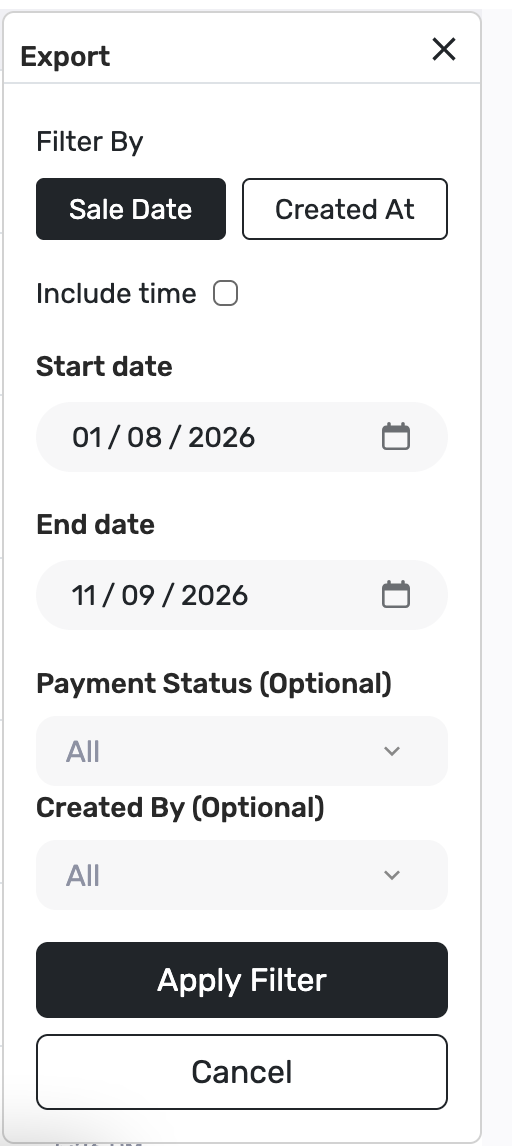
You must pick both a Start date and an End date. For this guide, set those two dates and leave everything else as it is. Posa will export every sale in that range.
The other fields on this panel are optional. You do not need them for a first export, but here is what they do:
- Include time — leave this off so you pick whole days (for example 1 September to 7 September). Turn it on only if you need a more exact window, such as 9:00 AM to 5:00 PM on a single day. When it is on, Start date and End date also ask for a time.
- Payment Status — leave this on All to include Paid, Partially Paid, and Unpaid sales. Choose one status if you only want that kind of sale — for example Paid only, or Unpaid so you can follow up on money still owed.
- Created By — leave this on All to include sales from every staff member. Choose a name if you only want sales recorded by that person.
6. Click Apply Filter
Click Apply Filter. Posa builds the Excel file and your browser starts the download. You do not need Cancel.
7. Find the downloaded file
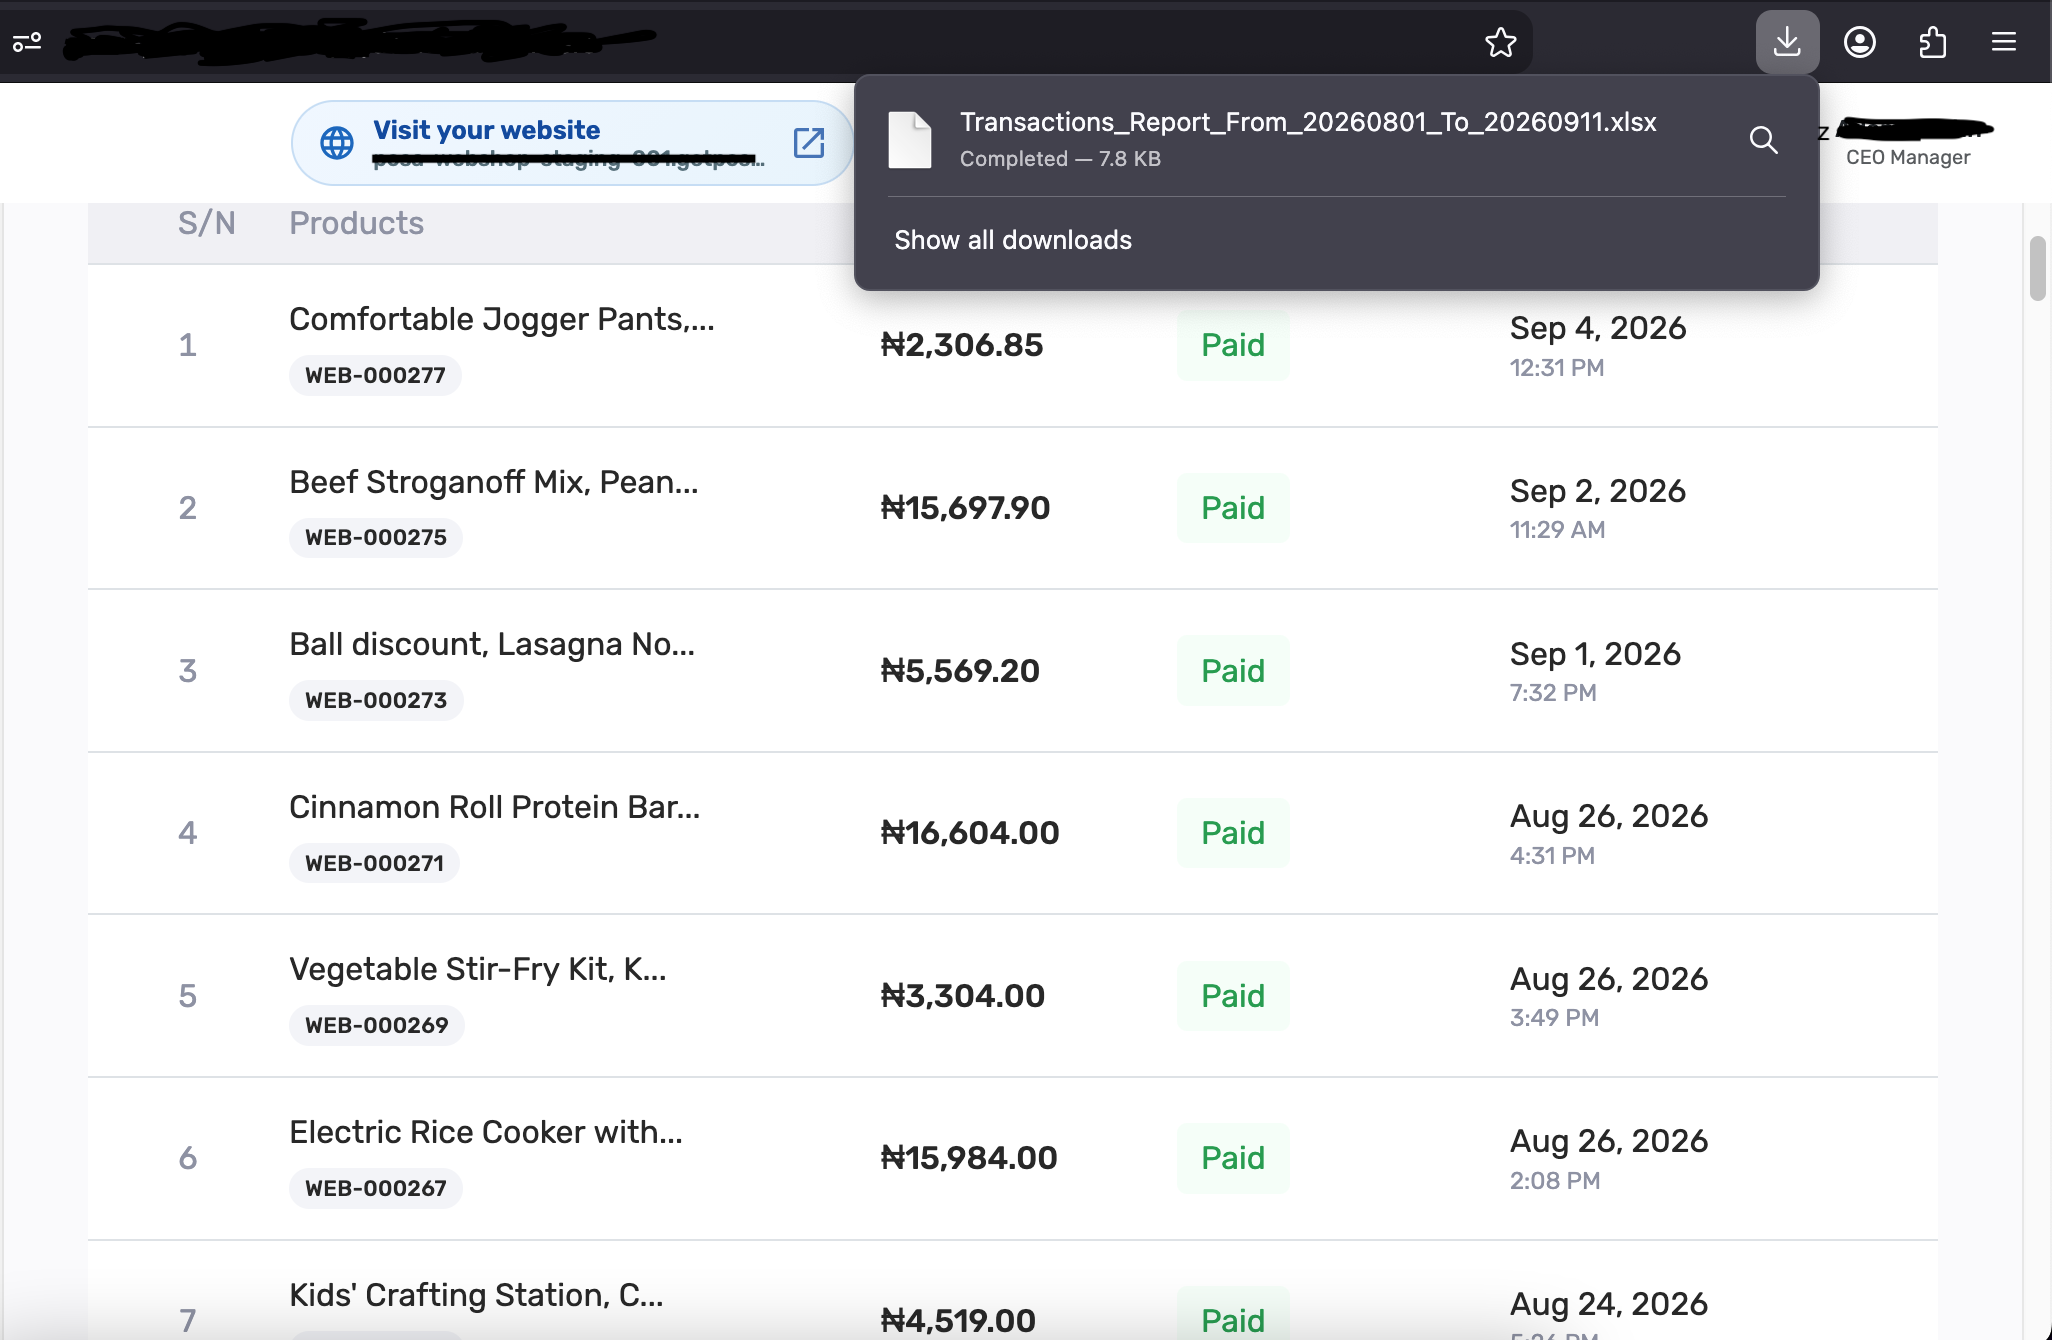
Your browser saves a file such as Transactions_Report_From_…_To_….xlsx. Open it from your downloads. If you see that file, the export worked.
8. Open the spreadsheet
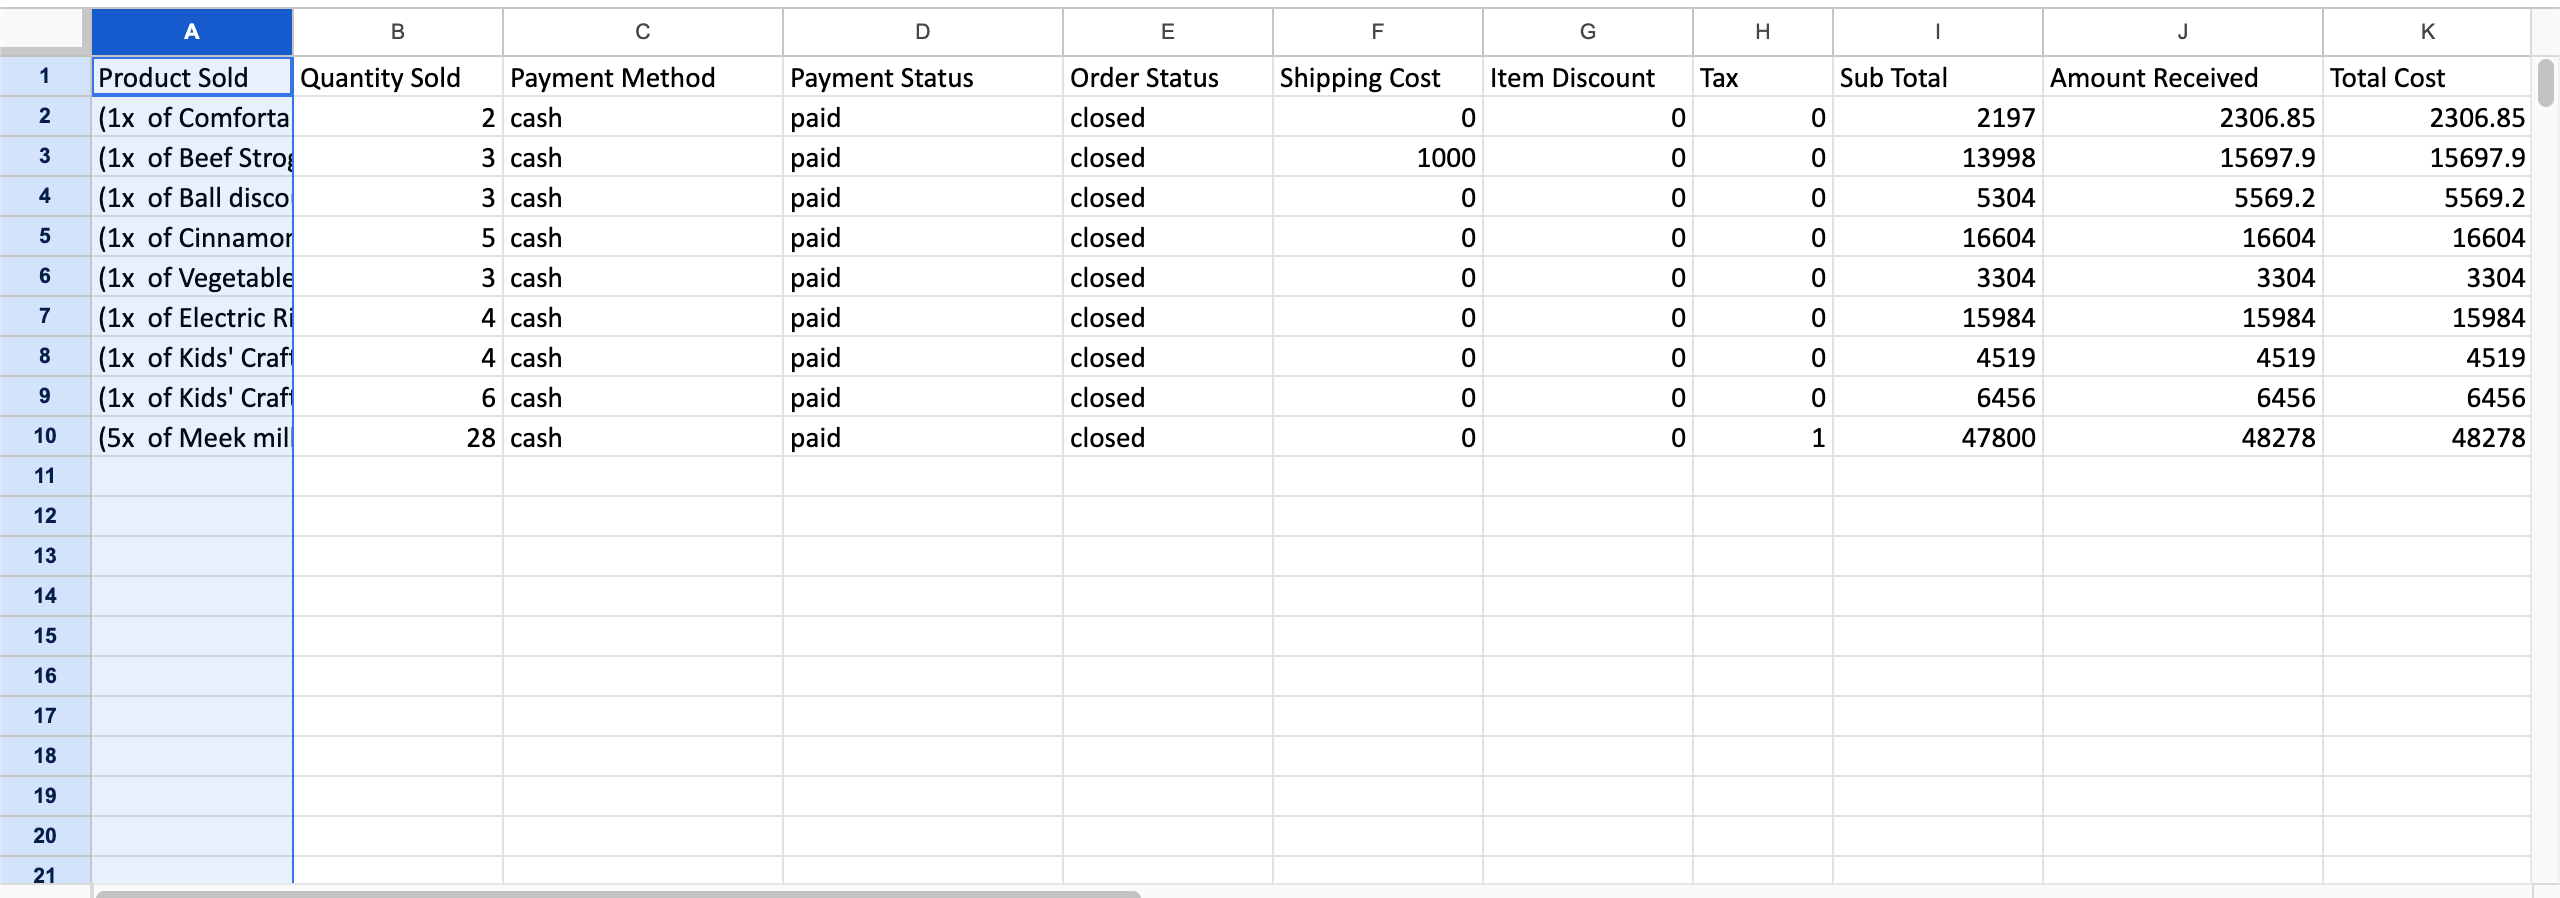
Open the file in a spreadsheet app such as Microsoft Excel or Google Sheets. Each row is one sale. You will see columns such as Product Sold, Quantity Sold, Payment Method, Payment Status, Amount Received, and Total Cost.
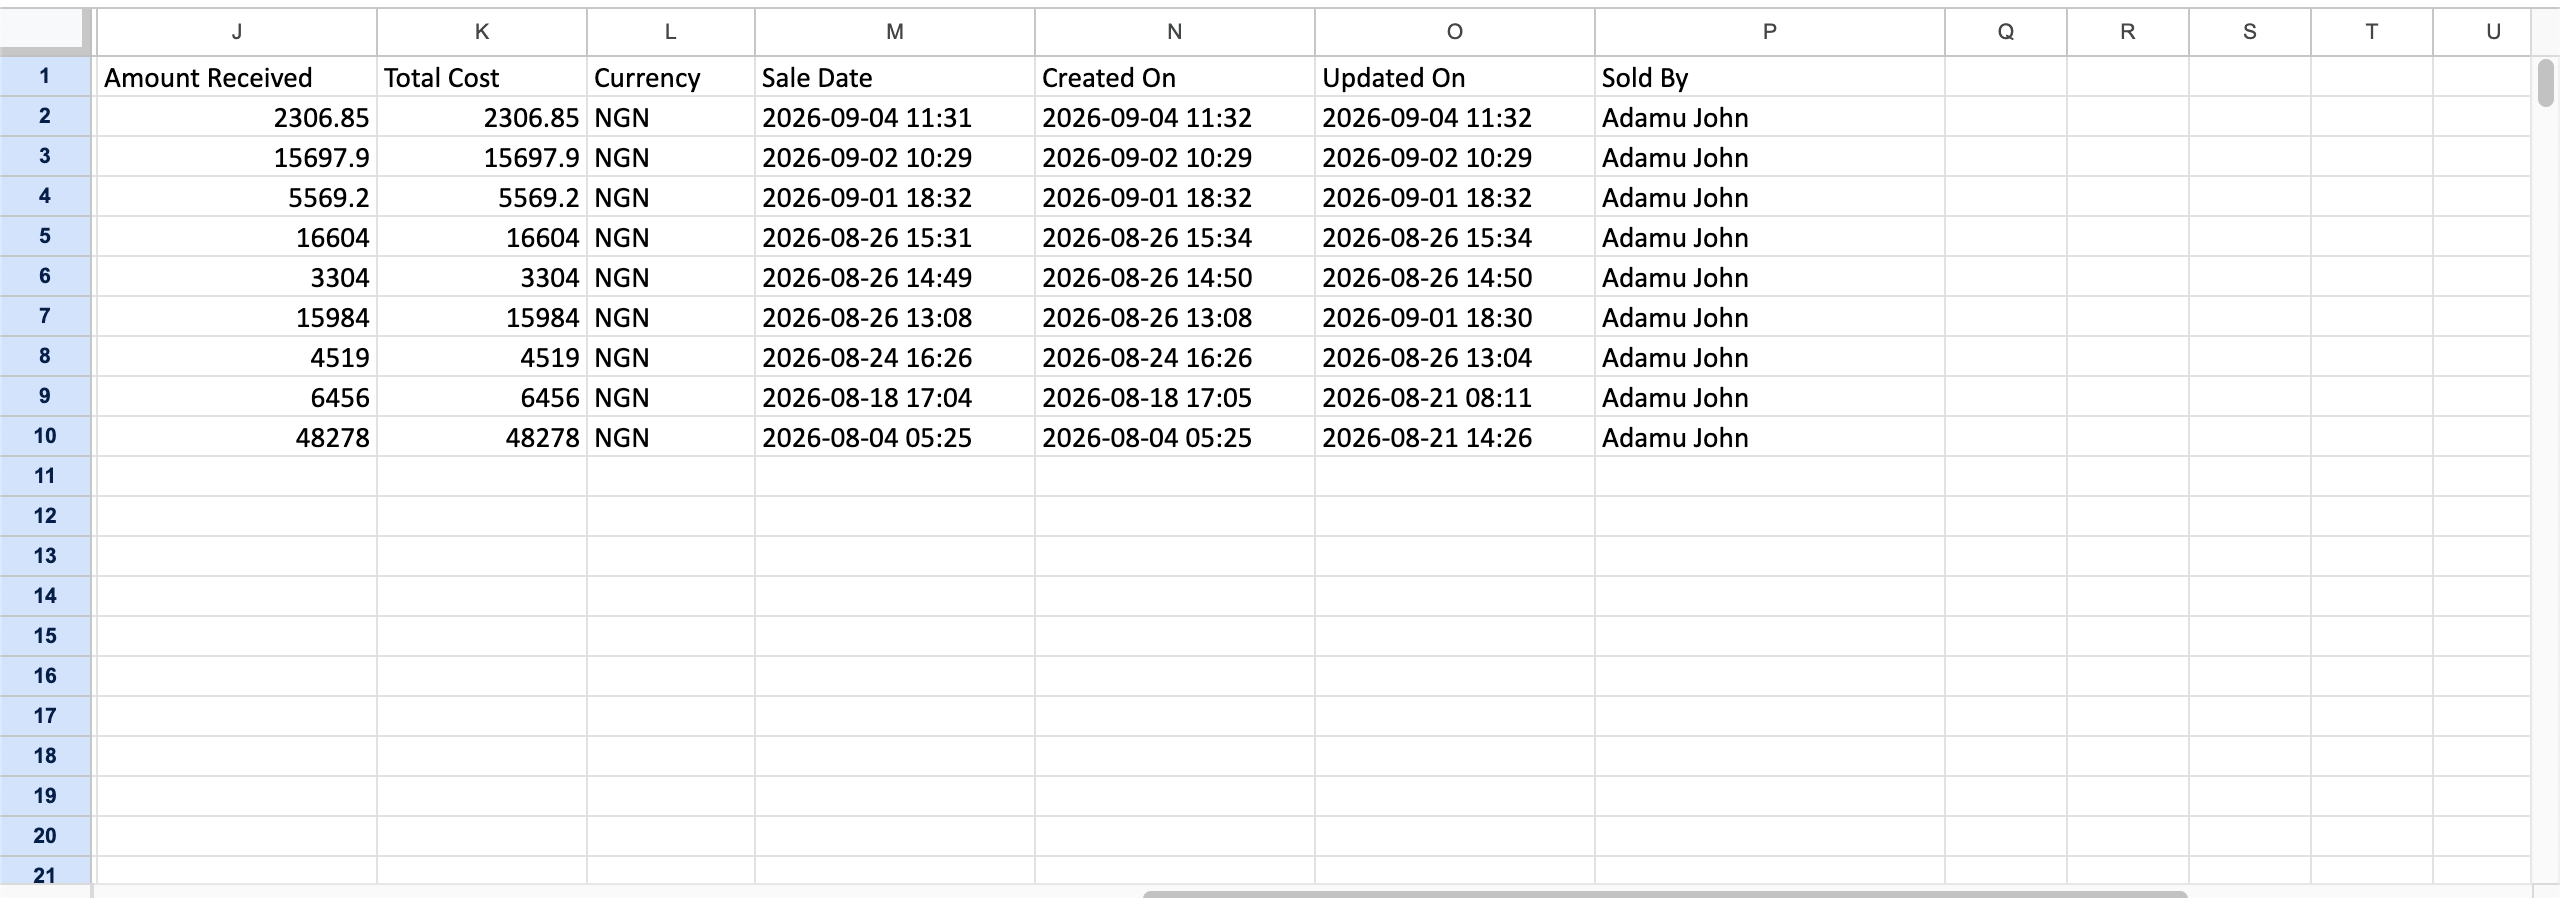
Scroll right for more columns, including Sale Date, Created On, and Sold By. You can now save, print, or share this file as you would any other spreadsheet.
Published by Posa Technologies · getposa.com
← More guides